
In Houdini we distinguish different types of parameters that we want to clarify here. A golden source can be found here on the Houdini help site. We now summarise the most important details to take away.
Node parameters
The addition of this parameter has been done in the “Creating Geometry From Scratch” tutorial. Parameters created this way will appear by default with a slider.

Global variables
Houdini provides a way to access global variables such as $F, $FF, $T, $FPS, $PI, $E, $HOME and so on. A list of these can be found here.
The animation tutorial shows how to use $F inside the Node options but not inside actual VEX code. One way in order to use for example $F inside VEX code we need to insert a node parameter. Lets continue the “Creating Geometry From Scratch” Tutorial to understand this.
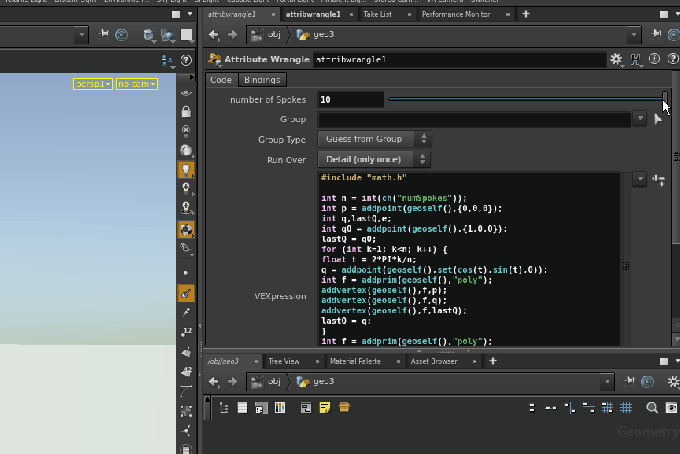
Previously we needed int n = int(ch(“numSpokes”)); to grab our parameter from the slider into the vex code. Using the slider we can insert 10*$F/$NFRAMES into the number of Spokes field to make numSpokes carry the information of $F into the VEX code. Now when we hit play at the bottom left we will see the result in the scene view.

Attributes
Attributes are a powerful tool that you will need in order to access essential data of your geometry as well as custom data that you want to pass from node to node. These are directly usable Inside a VEX code node. When you look for specific VEX functions be sure to check the VEX function documentation here.
Some global attributes are always accesible inside VEX code, such as @Time, @Frames, which can replace the need of using $F.
Inside a node that is handling points @ptnum is an attribute that returns the index of the point currently handled and @P for the coordinate of a point and @numpt the total number of points. The most important such attributes are listed here. For example, to access the index attribute of the next edge in a curve of points you can use: int halfEdge = pointhedge(0,@ptnum);. If you want to know what half edges are look here.
To add a new attribute simply create it inside the VEX code. Here we add a mass and an orientation to the point. These are arbitrary names. The default value is always zero.
|
1 2 3 4 5 6 |
<span class="line"><span class="kt">#This way: float</span> <span class="err">@</span><span class="n">mass</span> = <span class="mi">1</span>; </span><span class="line"><span class="kt">vector</span> <span class="err">@</span><span class="n">up</span> = <span class="k">{</span><span class="mi">0</span>, <span class="mi">1</span>, <span class="mi">0</span><span class="k">}</span>; #OR this way to: f@mass = 1; v@up = {0, 1, 0};</span> |
You can view the a list of types with their respective syntax here.
One example on how to get the attribute of the destination of the previously acquired halfEdge is the following.
|
1 2 |
int nextptid = hedge_dstpoint(0,halfEdge); vector nextP = attrib(0,'point','P', nextptid); |
The zero indicates the main input geometry. When multiple geometries flow into one node this index can separate the accesses. In general, the attrib( … ) function looks like this:
|
1 |
attrib(inputGeometry, 'typeOfObject' , 'nameOfAttribute' ,idOfObject); |
inputGeometry: id of geometry. Default is 0. Other inputs into the node can be reached by id 1, 2, 3 respectively.
typeOfObject: ‘point’, ‘vertex’, ‘prim’, ‘detail’ etc… the types Houdini handles.
nameOfAttribute: ‘P’, ‘N’, ‘pscale’, ‘orient’, ‘mass’, ‘area’ whatever you define or there is by default.
idOfObject: 0, 1, 2, … id of object. All points, vertices, primitives are always enumerated from 0 to @numpt-1, @numvtx-1, @numprim-1 respectively. ‘details’ can be accessed with index 0 always.
We can also set attributes of other points:
|
1 |
setpointattrib(geoself(),"up",nextPointID,myVector); |
To see Attributes in action refer to the later chain curve example.
Another great attribute to remember is the @Cd attribute. It encodes the Color diffuse in RGB(red, green, blue) and can be manipulated by choosing Cd[0],Cd[1] and Cd[2] between 0 and 1.
Remember that it is important what kind of wrangle node you use. A point wrangle uses the attributes of points and runs the code over each point while a volume wrangle does the same for voxels. All of them are attribute wranglers with a selected Run Over group.

If you want to run the code only once select the Detail in Run Over inside the wrangler. If you want to run the code over every point choose “Points” etc…
Other Useful Values
Accessing the total number of points, primitives or vertices can be accessed using @numpt, @numvtx, @numprim.
The current id can be accessed by @ptnum, @vtxnum, @primnum.
A list of more expressions in VEX code or Hscript can be found here.
Here is an example of a detail attribute wrangle that grabs a neighbouring point and modifies its values. Pay attention how the the point values are grabbed and modified.
|
1 2 3 4 5 6 7 8 9 10 11 12 13 14 15 16 17 18 19 20 21 22 23 24 |
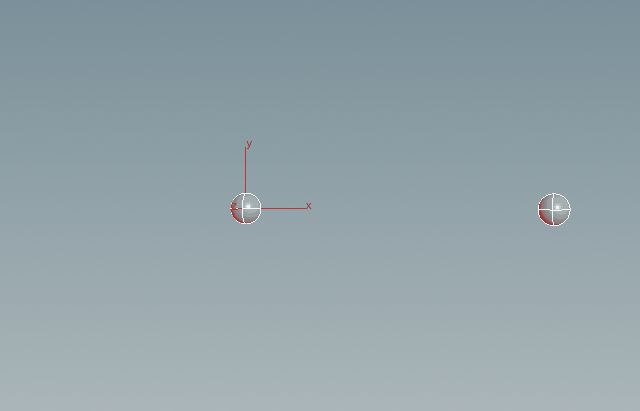
// let us have an example where we modify a value of // a neighbour point // the index of our own geometry, the first input to the node int geo = 0; // this is the point id of the center point by construction int ptid = 0; // let us look at a half edge from geometry geo point ptid int halfEdge = pointhedge(geo,ptid); // and use it to see the id of the target of the edge int nextptid = hedge_dstpoint(geo,halfEdge); // and then we read the position and mass of that point vector nextP = attrib(geo,'point','P', nextptid); float nextPmass = attrib(geo,'point','mass', nextptid); // then we double its vector and double the mass of that point setpointattrib(geo,"P",nextptid,nextP*2); setpointattrib(geo,"mass",nextptid,nextPmass*2); // now you can see the results in the geometry spreadsheet |
We also have an example of a point wrangle where the color is defined by the position.
|
1 2 3 4 5 6 |
// this code runs on every Point // here we use that we use the normal mapping // color convention because our geometry is close to // the unit sphere @Cd =@P*0.5+0.5; |
The two above example lead to this result:
More detailed examples can be seen in the chain curve example in a later tutorial. Notice that this is fundamental to understand in order to create more complex operations.
Inspecting Attributes
To view what attributes are currently in use you can look at the geometry spreadsheet located next to the scene view tabs after highlighting a node. Here you can see what values are attached to what points, vertices, primitives or globally to the detail.
As we can see here, a neighbour of point 0 has doubled it’s mass just as our code demanded.
Making Your Own Global Variables
In many applications you will have many adjustable parameters such as the number of iterations or the size of the step etc. It would be undesirable to have to find and dive into each separate node to adjust the parameters manually. We will now present a nice way to avoid this mess by collecting all parameters in one single node. Please do this to keep your code/network clean.
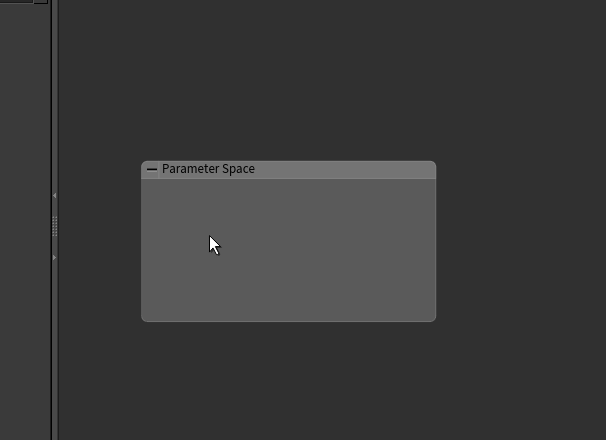
Create a null node and create parameters inside it as we have done in previous tutorials (creating geometry from scratch). This is a blank node which is ideal for this purpose. We will name ours parameters_space.
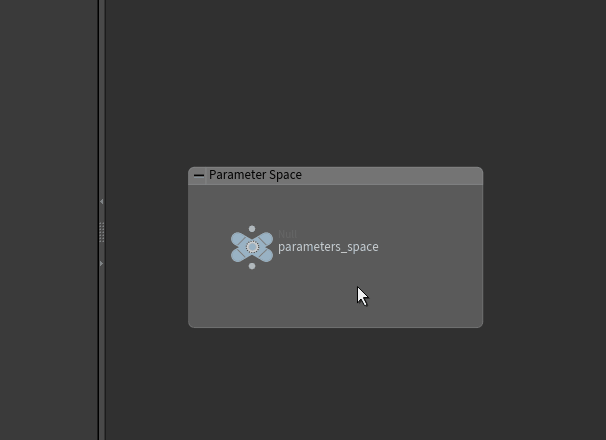
Next we show how to use this newly created parameter in three different settings.
In Hscript (used in the node parameter editor) we can simply call ch(“../parameters_space/epsilon”) to paste the value into the line.
In VEX code we use
float epsilon = ch(“../parameters_space/epsilon”);
to extract the parameter value.

In python we use
epsilon = hou.ch(“../parameters_space/epsilon”)
to extract the parameter value.

This method can also be used to grab parameters from other nodes.
